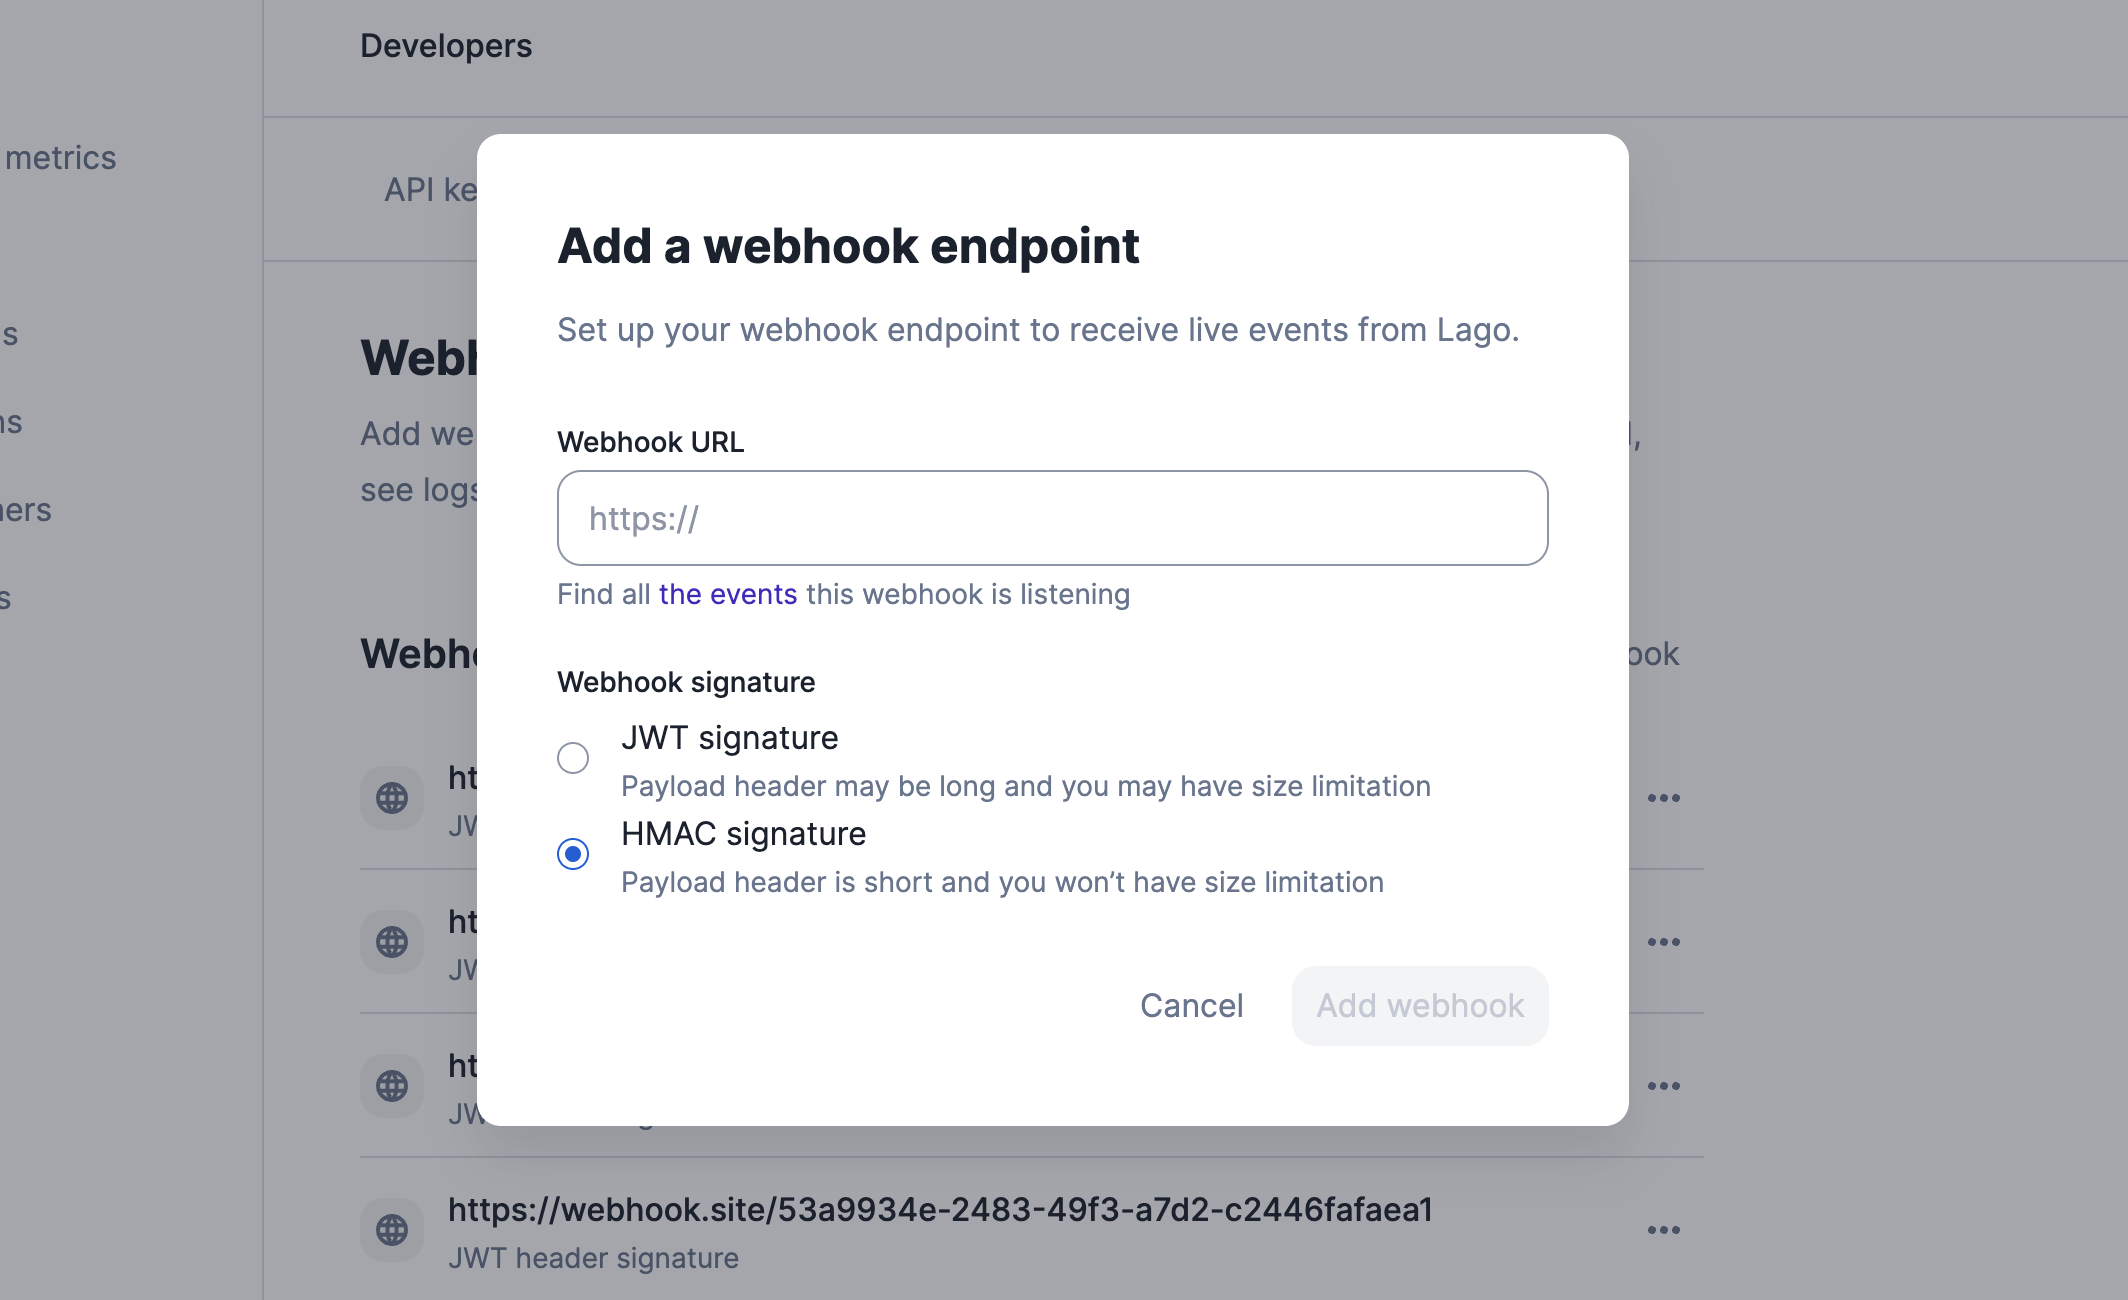
Adding a webhook URL
To add a webhook endpoint via the Lago app, follow these steps:- Go to the Developers section via the sidebar;
- Open the Webhooks tab;
- Click Add a webhook;
- Enter the webhook URL;
- Choose the webhook signature between JWT and HMAC; and
- Click Add webhook to confirm.
Note that you can add up to 5 webhook endpoints.
The webhook signature
By creating a webhook endpoint, you have two signature options.- Dashboard
- API
- The first is
JWT, with a possibly lengthy payload header and potential size limits; - The second is
HMAC, which features a shorter payload header and no size restrictions.
Accessing the webhook logs
Once a webhook is registered in the app, you can access the webhook logs:- Go to the Developers section via the sidebar;
- Open the Webhooks tab;
- Click on the webhook endpoint to see the list of events; and
- Click the reload icon to see new events (optional).
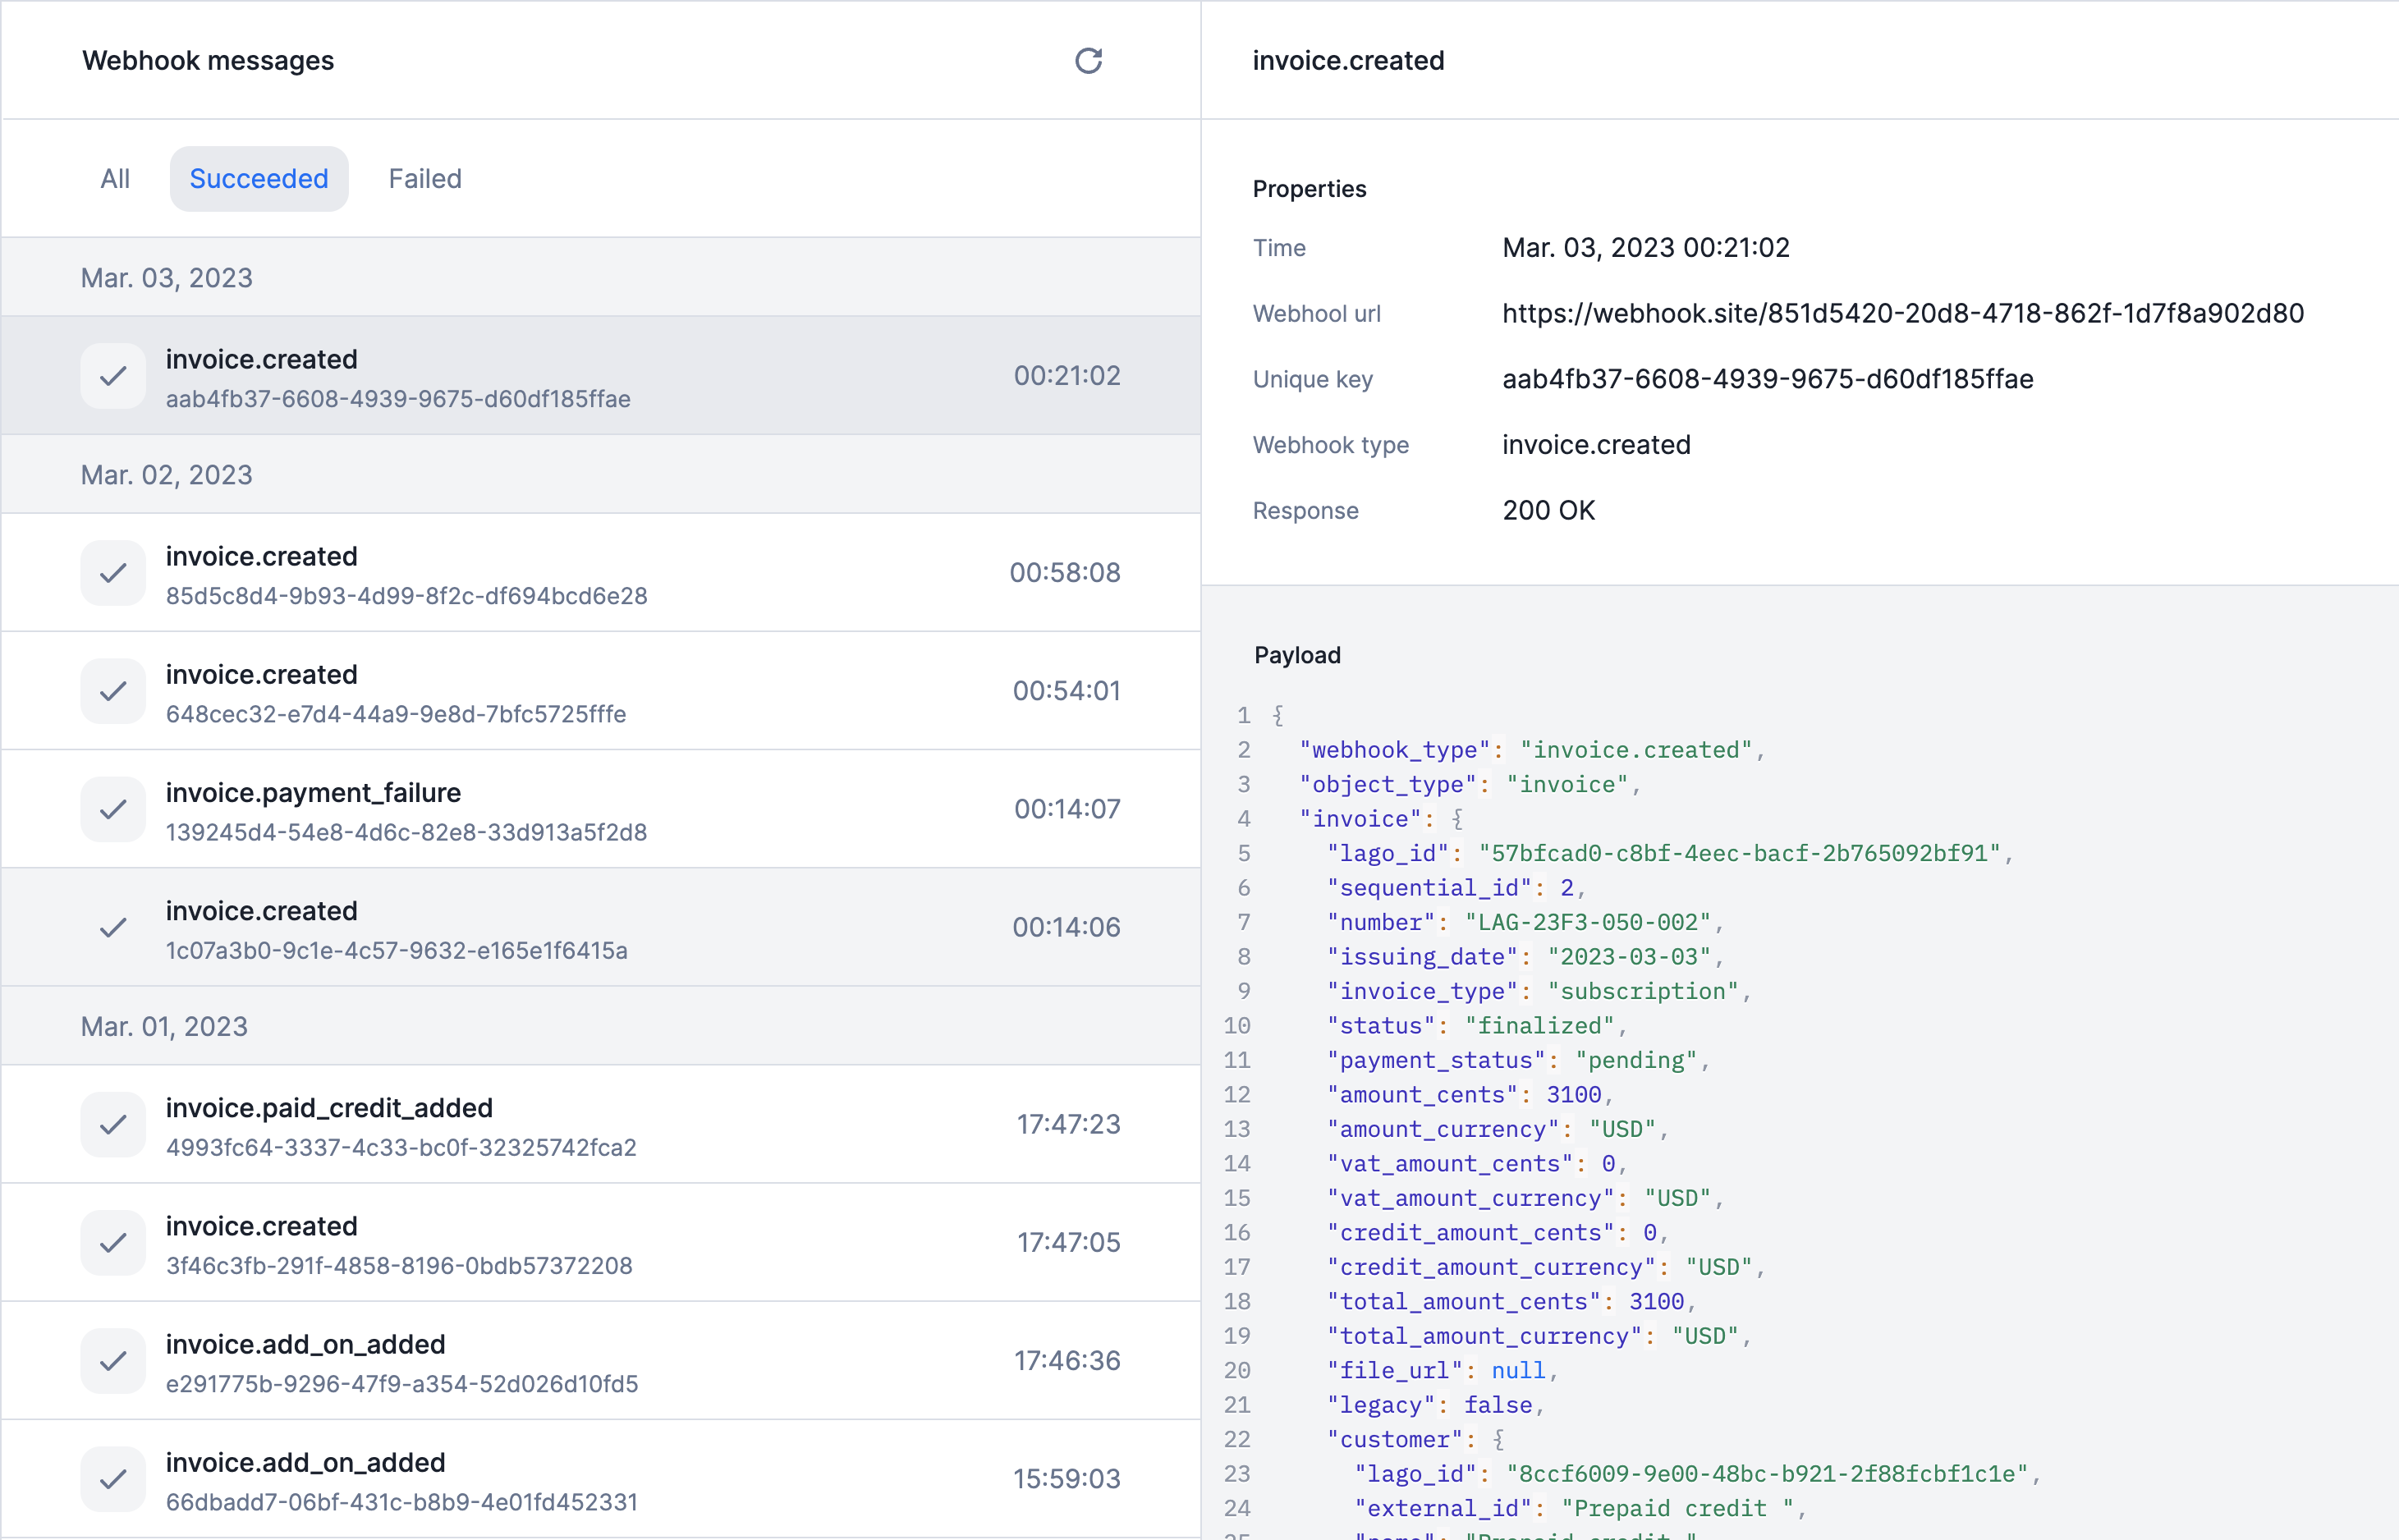
Accessing a specific event
You can see the details of a specific event by clicking on it. Depending on the event status, you will have access to two or three main blocks:- A list of properties, including:
- Timestamp: the timestamp of the event;
- Webhook URL: the URL used to listen to events;
- Unique key: idempotency key associated with the event;
- Webhook type: the webhook type used to understand the action triggered;
- Response: the response code (i.e. acknowledgement of receipt);
- Number of retries: if the event failed, the number of retries attempted;
- A JSON snippet with the arguments sent by Lago; and
- If the event failed, an error response will be included.